Loners
Introduction
Calling a loner is one of the most powerful choices in Euchre. A single successful loner earns four points, which is almost half of everything needed to win. Most players do not attempt loners often enough. They worry about being euchred or they wait for dream hands that almost never appear. A strong player understands that going alone is simply a scoring strategy. If the hand does not require partner support, then the partner becomes an obstacle instead of an asset.
This guide explains when a loner call is correct, how to judge the strength of a hand, and how to defend properly when the opponents go alone. Each section includes real examples that show how these ideas work at the table.
The Loner Hand
The definition of a loner hand is not simply having unbeatable cards. The definition should instead be a hand that does not need assistance. The question is simple:
Does your partner meaningfully increase your chance of taking all five tricks?
Loner hands usually share three traits:
- They control trump early
- They contain at least one dependable winner outside trump
- They do not require partner help for timing or setup
These qualities matter more than specific combinations. For example, a hand with three trump and an ace king outside trump can score five tricks even without the left bower. A hand with four trump and no off suit ace can still be a winning loner because the caller often removes the opponents’ only stopper through an early trump pull.
Now that we know what defines a loner hand, what do these hands actually look like?
Common Loner Patterns
Following is a non-exhaustive list of hands that often make for successful loners, borrowed from the Ohio Euchre website (no longer active at the time of writing), our one true Euchre Guidebook. It is important to review these and to try to remember them, because a lot of these are overlooked out of fear by newer players.
- Holding any five (5) trump in your hand
- Any four (4) trump (with an off-suit Ace works best)
- AKQ of trump, with off-suit AK combination
- Both bowers and an off suit AKX (works best from first seat)
- Both bowers and a weak off-suit
- Any three (3) trump (including one bower) and two-suited
- Any three (3) trump (including one bower) and two off-suit Aces
- Bare right bower and three off-suit aces
- RX with AK off-suit
- Your partner turned up the right, you hold left and two other trump with a strong off-suit
- Dealer turns down a bower
- This strengthens a loner in Next, as the left bower is now buried
Hand strength alone does not determine whether a loner succeeds — seat position changes everything.
Positional Analysis
A loner attempt is shaped as much by where you sit as by the cards you hold. Each position offers different levels of control over the timing of the hand. Some seats naturally protect off-suit winners and give you better control over when trump is played, while others force you to react to opponents first. The dealer also adds a unique wrinkle, since anyone who orders to the dealer gives them both extra trump and a potential void. Because of these differences, the same hand may be a clear loner in one position and too risky in another.
Seat 1
First seat is the strongest position for a loner attempt. You act before anyone else, which gives you something no other position has: the first lead into a table with no information revealed. That single advantage changes how strong a hand needs to be and how aggressively you should pursue four points.
Why First Seat Is So Powerful
From first seat, you immediately control the order in which suits appear. This means you can remove trump before anyone can cut your off-suit winners. The most common reason a loner fails is that an off-suit ace gets trumped. First seat prevents that. You pull trump before anyone has the chance.
This is the exact reason the original text explains first seat as “the best position to call a lone.” By clearing trump before risking off-suit strength, you remove most of the opponent’s defensive options. You are deciding the timing, and timing is what protects your off suits, not just the off suits themselves.
How Strong Does Your Hand Need to Be?
You do not need three guaranteed tricks to call alone. You need a hand where a partner cannot improve your result. That is the real criterion. From first seat, the threshold is even lower. A hand with three trump, including a bower, plus a strong off suit often has a better chance of making four points alone than making two with a partner. Your partner cannot “protect” your ace if you lead trump first. They also cannot help you score four points even if your hand is good enough to earn it. The partner caps your ceiling.
Example: Hearts are trump. You sit in first seat with:
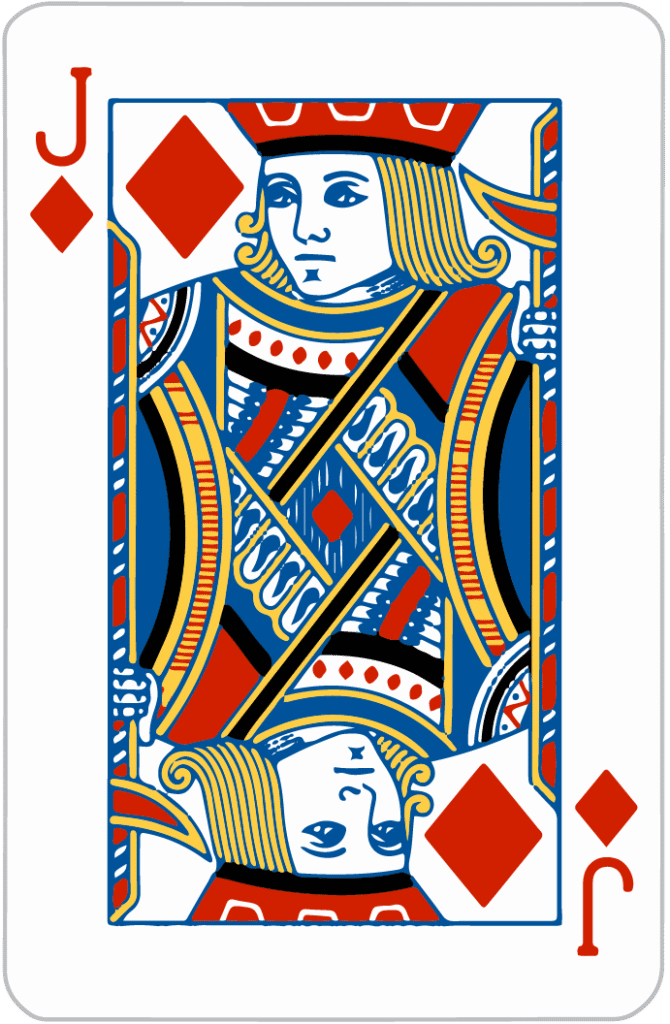
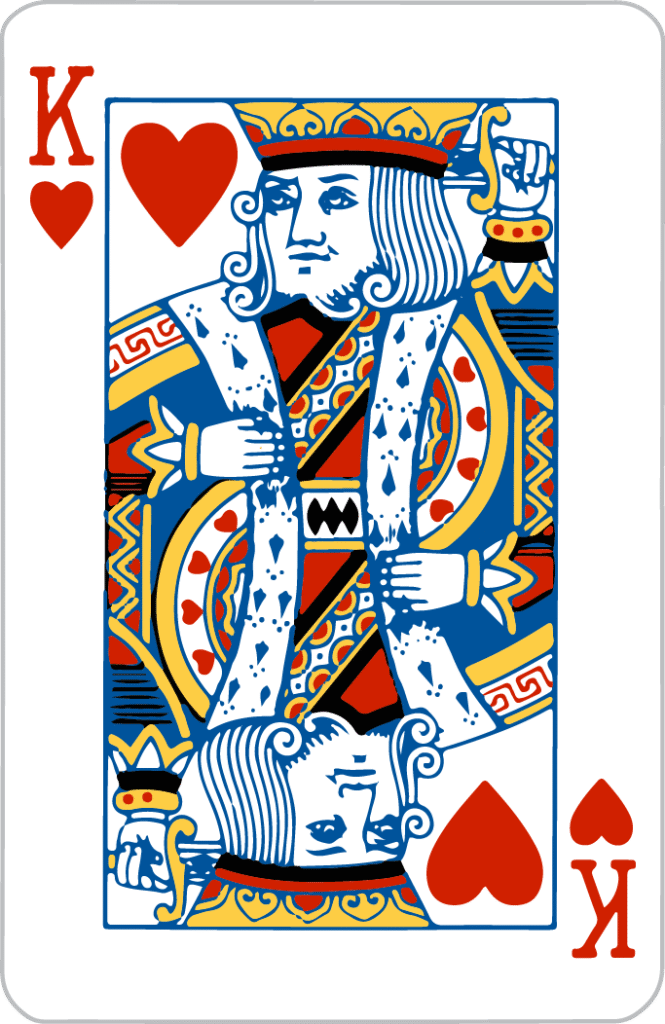
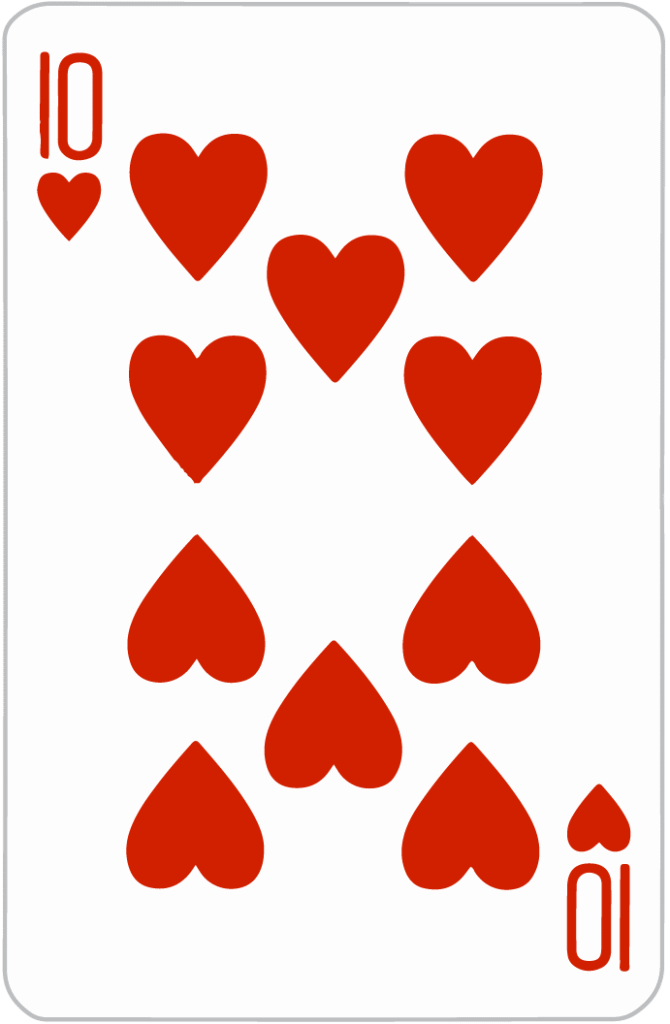
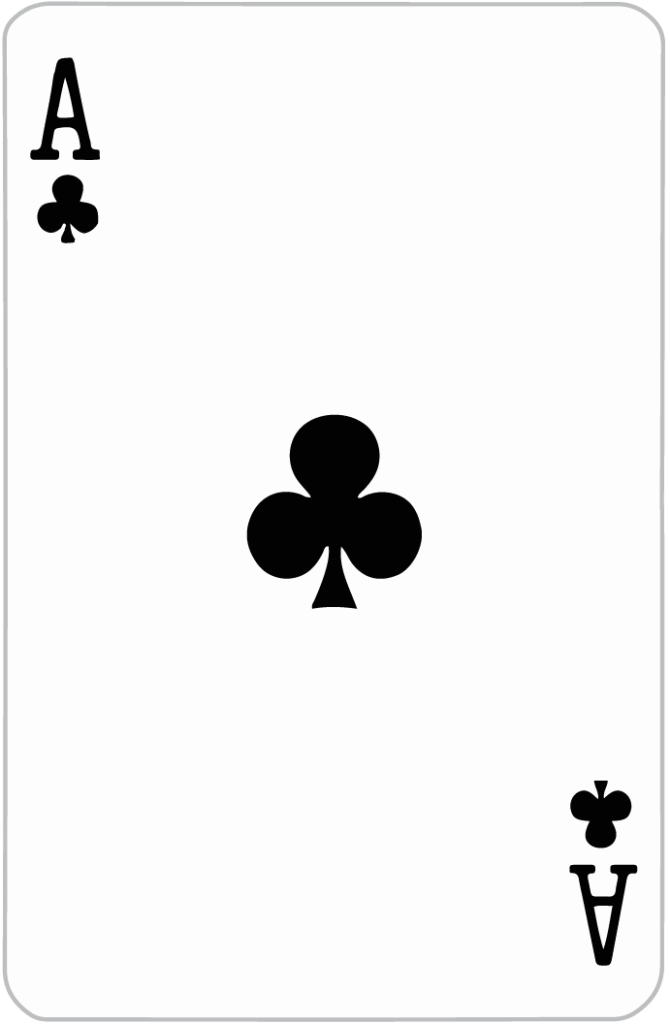
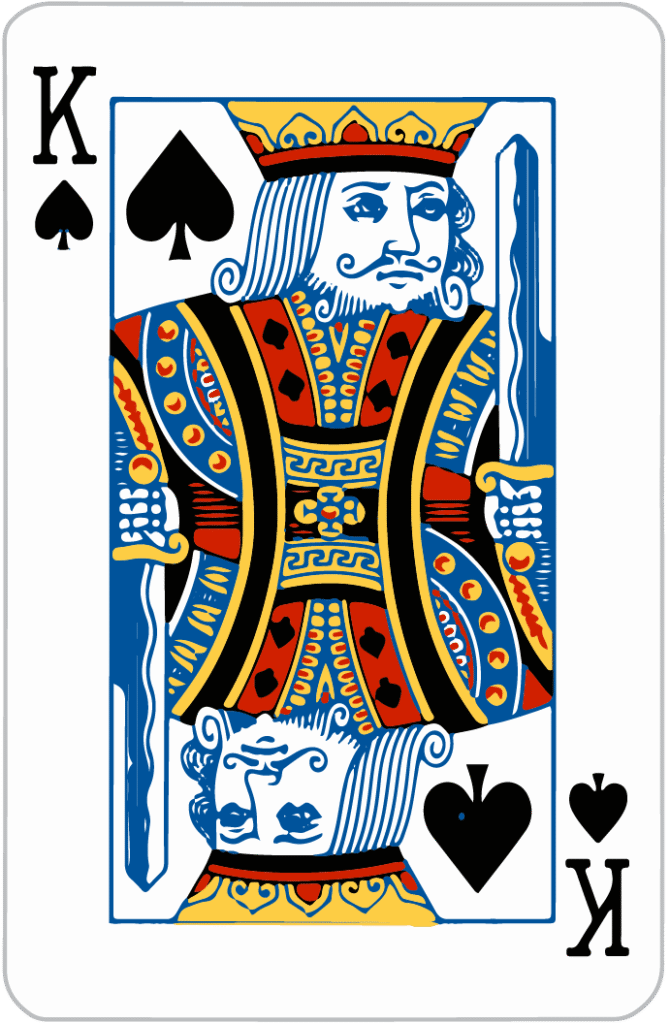
This hand makes many players hesitate. Missing the right feels like a risk, and that uncertainty often leads to taking a partner. But the only card a partner could possibly add that looks useful is the very card you are worried about — the right. If they did have it, they would not be doing anything you weren’t already set up to do. You still control the hand through your own timing, and the sweep would happen with or without them. If they don’t have the right and it sits with the opponents, a partner is still no help, because a single missing boss trump is not something they can save you from. In both cases, bringing a partner adds no real benefit, and can only get in the way once play begins, for reasons that will be explained in a later section.
This hand is strong because you control the order of play, not because you hold the perfect cards. A partner cannot fix what beats it, and cannot increase what wins it. Going alone takes advantage of what makes first seat powerful in the first place.
Score Pressure
When first seat holds a hand strong enough to sweep at eight points, a partner adds nothing useful. If they take a trick with an ace, they also take the lead away from you before you have finished pulling trump. Once you lose control of the timing, an opponent can lead into a suit that kills your sweep. Even though you are still favored to win the game eventually, you lose the chance to end it immediately with four points.
Going alone at eight ends the game on your terms because you never surrender tempo. Going with a partner may still earn two points, but it also risks dragging the game into extra hands you never needed to play.
The Dealer
The dealer is the second-best position for a loner attempt, and for a very different reason than first seat. A first-seat loner succeeds by using the first lead to clear trump. A dealer loner succeeds by using the pickup to reshape the hand before it ever begins.
The Power of the Pickup
The dealer sees six cards while everyone else sees five. One of those six is known to everyone: the turn card. When it is powerful, it improves your hand. When it is weak, you can still use it to your advantage by picking it up and discarding into a void.
That discard is the entire reason the dealer becomes dangerous on a loner call. Creating a void means you can control when you trump in, and more importantly, your trump will never be wasted by getting overtrumped by someone behind you. There is no player after you. Any trick you fight for with trump, you win.
This is why the dealer is one of the strongest positions to play alone. A dealer plays last on the first trick, so they can use the smallest trump necessary to take control, then immediately pull boss trump.
Small Trump First
In partnered play, a dealer sometimes uses a high trump to secure a lead. In a loner attempt, the math flips. Because the dealer plays last, they can take the first trick using the lowest trump that still wins. That tiny optimization has a huge effect on the rest of the hand.
By doing so:
- You avoid wasting your best trump early
- You preserve the right (or left) as a sweep card later
- You control the rest of the hand without interruption
A dealer should be able to take the first trick using only a small trump. This timing is what frees the dealer to pull a full round of trump immediately after.
Discarding Into a Void
The dealer’s void matters because it changes how the hand is defended against you. When you pull trump, most defenders still have to follow suit. The one person who would have been void and able to trump early is now the bidder—the dealer. That sharply reduces the number of ways the defense can stop the lone.
That is why hands with three trump can sometimes be just as playable as hands with four trump in the dealer position. The dealer gets to engineer the shape of the hand.
When Partnerships Make Things Worse
The decision to go alone should never be based strictly on strength, but on whether the partner can help. As the dealer, this logic becomes even clearer. After you have picked up and voided a suit, a partner can only do two things:
- accidentally steal a trick you wanted to take later
- win a trick too early, giving the lead back to the opponents
- cash an ace that had no value, forcing you to face defense without the tempo you built
Your void is a weapon. A partner cannot use it, and they can get in the way of your timing.
Score Matters
The text includes several cases where not going alone causes a team to lose, especially at eight points. A dealer who has shaped their hand with a void and a small trump starter has far more control than a partner can add. The wrong partner play can squander that control, turning a certain sweep into a one-point grind that fails to end the game.
When the dealer is strong enough to shape the hand on their own, it is often correct to push for four points even if the hand is not perfect. The rewards outweigh the risk, especially when the loner turns a losing probability into a winning one.
Seats 2 & 3
Not every strong hand is playable as a lone. The biggest reason is not trump strength — it’s timing. From second and third seat, you do not control the first lead. Someone else gets to test your hand before you have the chance to pull trump or protect your off suits. That single disadvantage changes the math of a loner dramatically.
Seat 2
In second seat, you act after first seat has already passed. That often means first seat is weak in the turned-up suit, which can make your hand look even stronger by comparison. The source text highlights this as a situation where many players underbid — second seat should consider a loner when holding three trump and a strong off suit.
However, the risk remains: a defender leads before you do. If that lead hits one of your unsupported off-suit cards before you get to remove trump, you might lose a trick you expected to own. This is why a loner from second seat requires the hand to not only win tricks, but also survive an opponent’s lead.
The benefit, however, comes from what is not being played. On a loner, nine cards are out of circulation — your partner’s five plus the four in the kitty. That significantly reduces the chance that an opponent has both the right card and the right seat to beat you. If you have strong trump and a protected off suit, it can be correct to go alone from second seat because the defensive resources simply may not exist.
Seat 3
Third seat is the most difficult position from which to attempt a lone. You play after first seat and second seat have both acted, and if first seat is strong in the turned suit, they can immediately threaten your off suits by leading into them before you can pull trump. This is the only seat where a very strong trump holding may still be too risky, because you are reacting, not controlling.
Very few loners are made from third seat. This is not because the hands are worse, but because the timing belongs to everyone else. Even a hand containing both bowers can be put at risk if the first lead forces you to use a high trump immediately and disrupts your sequence. Only hands with clearly dominant trump and off-suit insurance should be played alone from this seat.
Ordering Up the Dealer
Calling alone from seats two or three becomes more dangerous when you are ordering to the dealer. Giving the dealer an extra trump — and potentially a void — creates a powerful defensive threat. The dealer can overtrump you exactly when you are trying to prevent an opponent from cutting your winners. Even hands that win easily from first seat or dealer may fall apart when the dealer has the ability to reshape their hand against you.
Even with strong position and the right cards, many loners still fail for a different reason: partnership interference.
The Partner Problem
A loner works when one brain controls the hand.
A partner adds another brain that does not know the plan.
They might win too soon, or reveal too much.
Once that happens, the sweep is no longer guaranteed.
A partner may not play badly.
They may simply play without knowing what you need.
A loner hand succeeds because one player controls every important moment. The caller decides when trump is removed, when off-suit cards are cashed, and how long the defenders stay unsure of what is safe to throw. When a partner stays in the hand, that control is shared with someone who cannot see the caller’s cards. Even a good partner with the right instincts becomes unpredictable from the caller’s perspective.
The way this breakdown happens is consistent. There are two real ways a partner disrupts a hand that was strong enough to go alone.
Interrupting the Sequence
Some loner attempts work only because the caller expects to stay on lead for several tricks in a row. They might need to pull the remainder of trump before touching an off suit, or they may need to cash cards in a very specific order. If a partner wins a trick, the caller loses that sequence. The partner now has to choose what to lead without knowing why the caller needed the order they had begun to create.
This is not about a partner stealing points. It is about losing the right to finish a plan that was already working.
Example: The caller has enough trump to clean the suit and two off-suit winners ready to cash afterward. Their partner wins one of those off-suits first. The caller still probably wins the hand for points, but they no longer get the timing they needed. Instead of clearing trump and cashing both suits cleanly, they now must play behind their partner’s decision. The hand becomes less reliable and less rewarding, and the caller gave up control they never needed to share.
Revealing Information
Many loners succeed because the defenders are unsure who is void in a suit, who still holds trump, or whether their ace is safe. When a partner plays, they often reveal that information without realizing it. A partner might trump early, discard a telling card, or win with a small trump. These plays can be correct in normal hands, yet they hand the defenders the knowledge they need to time a perfect stopper.
Loners win by keeping the defense uncertain. Partners take that uncertainty away.
Example: The partner trumps the opener with a small trump. Now the defenders know exactly where most of the trump is located and can safely throw away losers, keeping a specific card to stop the caller’s off-suit ace later. The caller might still clear trump afterward, but now the defense is waiting to use their stopper instead of misplaying it.
Nothing went wrong technically. The defense simply received clarity too soon.
Understanding loners means understanding how they fail. From the defender’s side, only one trick is needed.
Loner Defense
Defense only needs one trick. Most defensive mistakes come from players who try to win the wrong trick instead of working together to preserve a stopper.
Leading Strategy
Lead Your Longest Suit
If you do not have two aces to justify leading one, your best play is to lead from your long suit — the suit in which you hold the most cards. By leading a long suit, you maximize the chance that your partner is void and can trump defensively. This is the most reliable way to create a stopper that you cannot provide yourself. Following is an example where hearts are trump and the opponent is going alone. You’re in Seat 1.
You hold:
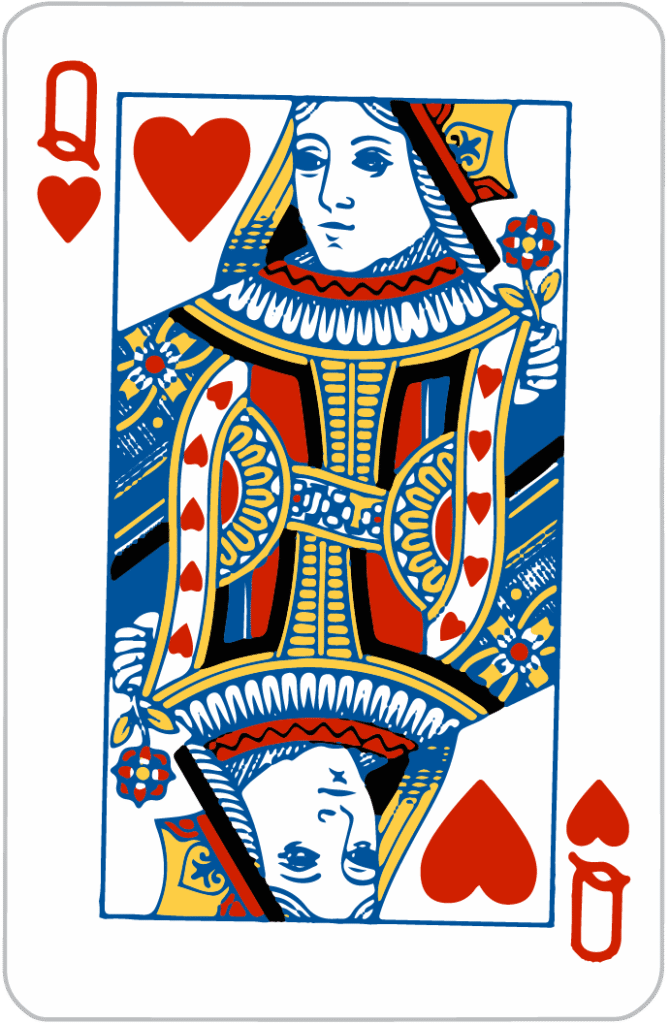

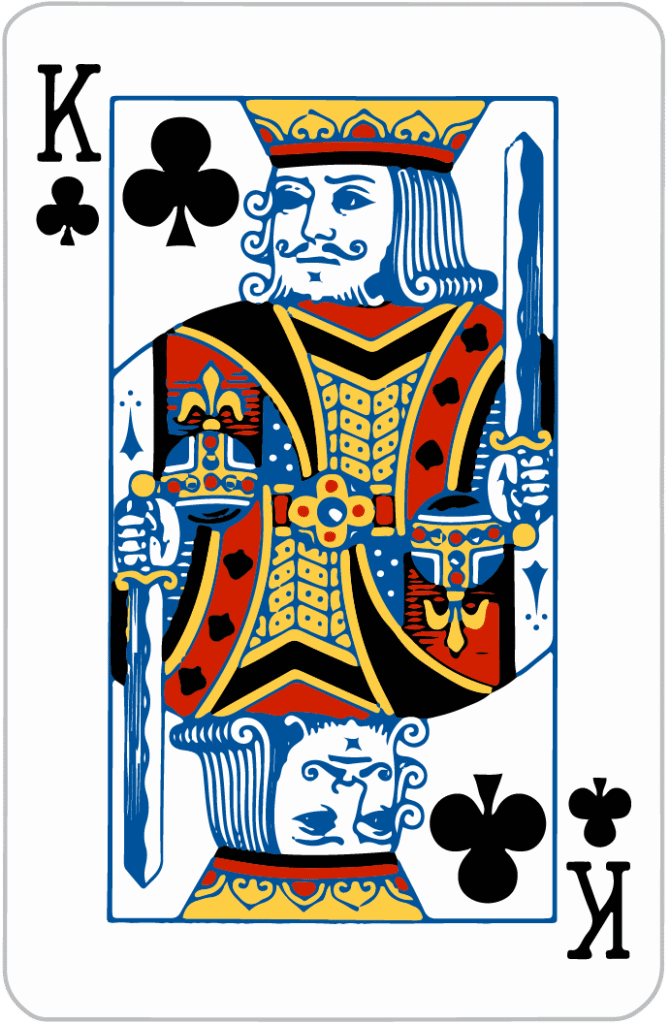
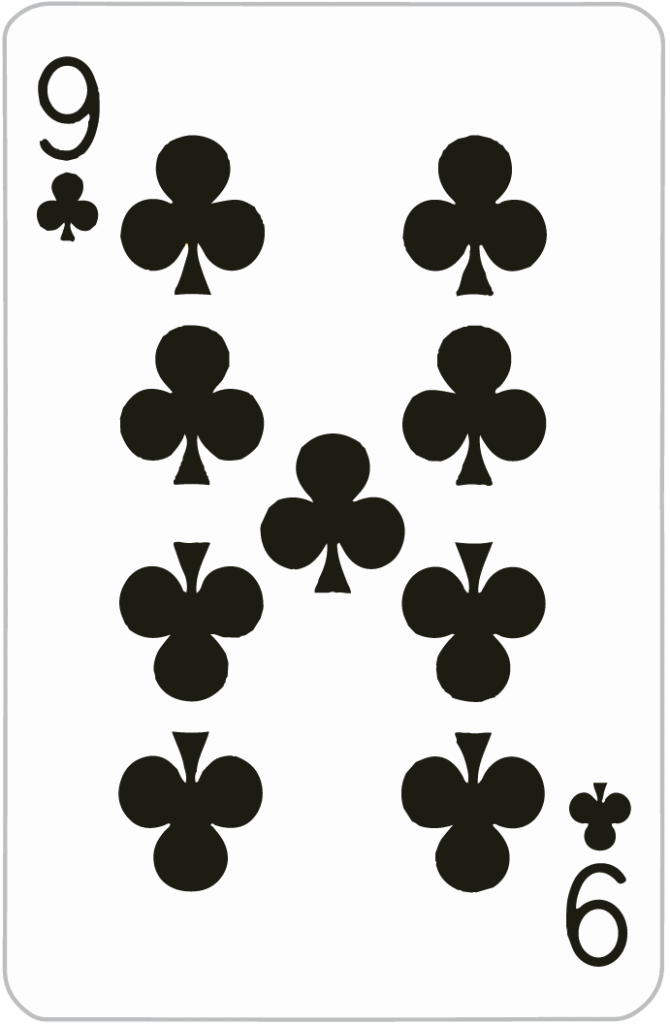
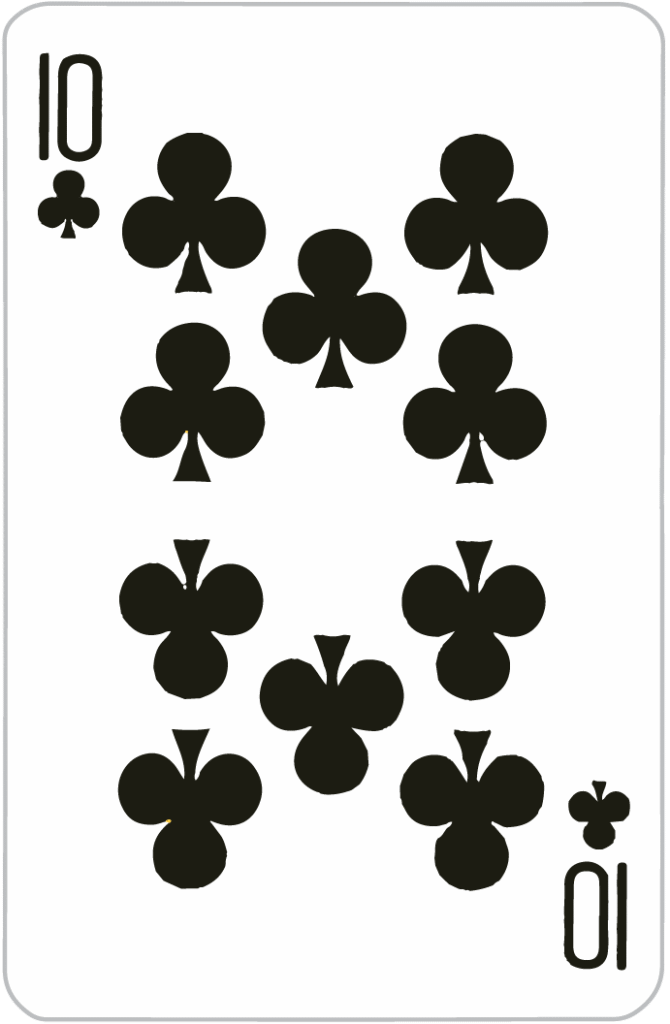
If you lead the spade, your partner might or might not have one. If you lead clubs, there is a stronger chance your partner is void and can trump in for free. That single free trump may be the only card in the entire defender’s hands strong enough to break the loner. Do not try to “guess the ace.” Try to hit the void.
Never Lead an Ace Into a Loner
An ace feels like a strong defensive play, but against a loner it often harms the defense more than it helps. When one defender leads an unsupported ace, that ace is often trumped by the bidder. Once that happens, the defender with the remaining off-suit strength becomes trapped later in the hand.
The problem is simple. One defender might have one ace, while their partner might have two aces. If the player holding only one plays it immediately, they eliminate their own stopper and force their partner to carry the entire defense alone. When the endgame arrives and only two tricks remain, the partner must guess which ace to use first. Guess correctly, the loner is stopped. Guess wrong once, the loner succeeds. The defense collapses because one player acted independently instead of protecting combined strength.
This is why the lead is selfish. It treats your single ace as the key card when it might actually be your partner’s stoppers that matter. If you wait, both defenders’ holdings remain unknown to the caller, and the defense has more flexibility on the final tricks.
By not leading your ace, you improve the defense in two ways:
- You give your partner a chance to win with one of their aces, not just yours.
- By leading a different off-suit, you might instead hit your partner’s ace in that suit, or even their void, letting them trump in for free.
These possibilities disappear the moment you cash your only ace. Keeping it concealed forces the caller to play through unknown territory, and that hidden information is often more valuable than a single trick.
An ace played can beat a card. An ace withheld can save the hand. Except when…
Stopper Exceptions
…If You Hold Two Aces, Lead One of Them Immediately
Having two off-suit aces is the rare exception to the above rule. Because you can cover two suits yourself, you can afford to reveal one early. Even if the caller is void in its suit, leading one of your aces allows:
- The caller to waste trump taking it
- You to guard the endgame with the second ace
- You to avoid leaving your partner trapped with a guessing decision
- You and your partner to know what suit to discard first
If You Have a Protected King, Treat It Like a Stopper
A protected king is a king with a lower card in the same suit (for example, KQ or KJ). If you lead the lower card, you may force out the ace, leaving your king as the top card later when it matters.
If your only potential stopper is a protected king, lead the lower card of that suit. If it wins nothing immediately, you are doing it correctly — the goal is to expose the ace early, not win the trick.
Trumping Your Partner
If your partner leads and you cannot follow suit, play your highest trump. Even if they led an ace. Even if you feel like you are “wasting” your card.
The reason is strategic. You are forcing the caller to spend a higher trump before they wanted to. This can often “pull the right” when they were planning to use a lower trump first, and it may allow your partner, on the next trick, to score with the next-highest trump defender. This strategy is especially effective against thinner loners. The only two exceptions are:
- Do not waste a nine or ten of trump if you know the bidder can simply overtrump it
- Do not break a protected left (left plus a small card)
Outside of those narrow exceptions, hit the ace. Hit anything. Force the bidder to react.
The Third-Seat Next Trap
When a player in third seat orders up alone, the dealer becomes the most dangerous defender. Why? Because the dealer can discard a card and create a void, then gain a trump by picking up. That void is a potential stop, but only if the partner knows how to use it.
The correct play is simple:
- Dealer discards in next
- Dealer’s partner leads next
If both partners know this, many third-seat loners die on trick one. The maker is forced to trump too low, allowing the dealer to overtrump with the card they picked up. The loner collapses immediately. Unfortunately, this strategy only works if both partners know it. That makes it powerful and unreliable at the same time, but it does work when executed correctly.
Seat 1 Trump Lead
In most situations, defenders should never lead trump against a loner. Leading trump usually helps the caller by clearing the very cards that could stop them. The only time a trump lead is correct is when you sit in first seat and you hold more than one trump strong enough to pull a bower. This play is not an attempt to take the trick yourself. It is an attempt to force the caller to spend a high trump earlier than they intended. By stripping away one of their sweep cards, you may set up a stopper for your partner in a later trick.
This tactic matters most when the loner caller is the dealer. When the dealer calls alone, they often create a void with the discard and are planning to use that void to trump in cheaply on an off suit. If first seat can remove a bower on trick one, the dealer’s entire timing is disrupted. Their remaining trump may no longer be strong enough to protect their off suit at the exact moment they intended. A small change in timing is sometimes all the defense needs to turn a sweep into a single trick.
This play should not be used just because you hold any trump. Leading a nine or ten of trump only gives the caller a free trick and does nothing to weaken them. The lead is correct only when you hold two or more trump with a high card capable of dragging out the right or left. If you cannot force a bower, you are not disrupting anything, and you should not lead trump.
The purpose of this lead is simple. You are not trying to win the first trick. You are trying to take away the caller’s ability to line up the rest of the hand in perfect order. A bower removed at the wrong time can leave your partner’s ace, or even your partner’s smaller trump, powerful enough to take a trick later. That one trick is the entire goal of defending a loner.
Summary
- True loner hands share three traits:
- Early trump control
- At least one dependable off-suit winner
- No need for partner support.
- Seat position is as important as hand strength:
- S1 and S4 provide the greatest control and allow lighter loner calls
- S2 and (especially) S3 require stronger hands because you must react before you can shape the hand
- Partners often make strong loner hands worse by interrupting sequencing or revealing information that allows the defense to time a stopper.
- Leading long suits, avoiding premature ace leads, trumping partner leads aggressively, and preserving protected stoppers are the most reliable defensive tools.
- Rare exceptions exist, such as leading with two aces or forcing trump early from S1, but these are tactical disruptions, not general rules.
